How to Use Batch Edit in Ultra Course
In the Ultra Course View, you can use Batch Edit to update common settings across all content, such as visibility and due dates. You can also use the tool to delete a group of selected course content. With Batch Edit, you can control content settings in one place and all at once.
On the Course Content page, open the menu on the right side above the content list. Select Batch Edit. 
On the Batch Edit page, all your content appears just as it does on the Course Content page. Sort the list by item title, category, or visibility.
Edit content visibility
- On the Batch Edit page, select the check box next to the items you want to update. You can choose individual content items or you can edit visibility for folders.
- At the bottom of the window next to Edit selection, open the Options menu and select Edit visibility.
- Choose to show or hide the content from students and select Save Visibility.
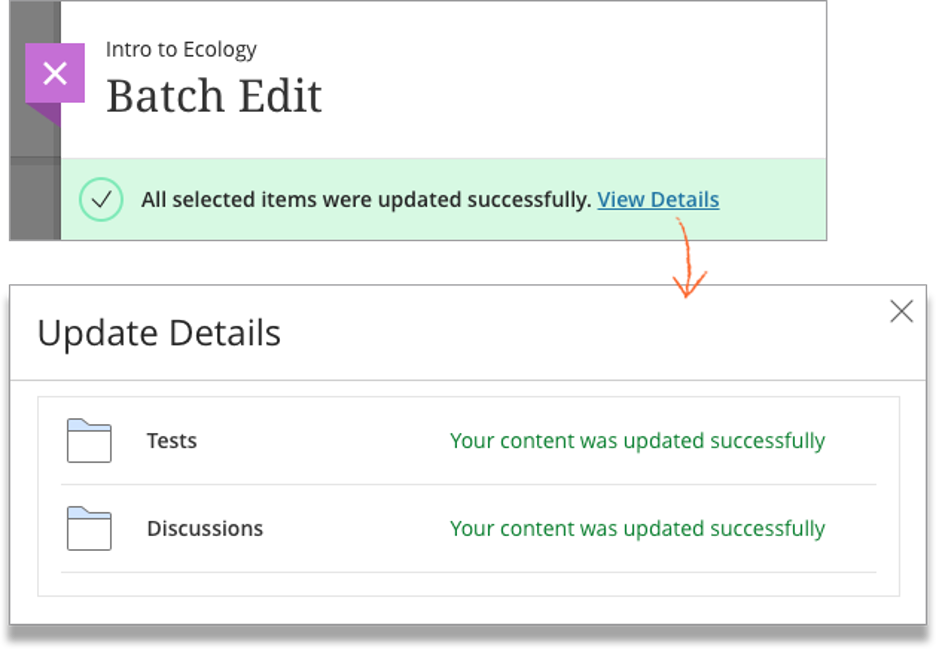
- A message appears that your content was updated successfully. Select View Details to confirm the content's visibility settings.

Content folders
Folders are a helpful way to organize and release related content in your course. Along with Batch Edit, folders can help ease the burden of content management.
You can update folder visibility with Batch Edit, just as you can for individual content items. Be sure to make your edits for the content you're currently viewing. You can't select and edit content between multiple folders.
- On the Batch Edit page, select a folder to open it.
- Select content within the folder and select Edit selection > Edit visibility.
- Choose to show or hide the content from students and select Save Visibility.
- A message appears that your content was updated successfully. Select View Details to confirm the content's visibility settings.
If you hide a folder from students, all content within the folder is also hidden. If you make a folder visible, you can still control the visibility of the items within the folder. Show or hide as many items in a folder as you want.
Content visibility settings are preserved if you change the folder's visibility. For example, you have a folder with five visible documents and a hidden test. When the folder is hidden, students won't see any of the content. When you change the folder to Visible to students, the five documents are now visible, but the test remains hidden.
Edit due dates
You can use Batch Edit to update content due dates when you reuse, copy, or import content. If you taught courses in an earlier term or calendar year, Batch Edit lets you select multiple pieces of content and adjust due dates in fewer steps.
- On the Batch Edit page, select the check box next to the items you want to update. You can choose individual content items or folders.
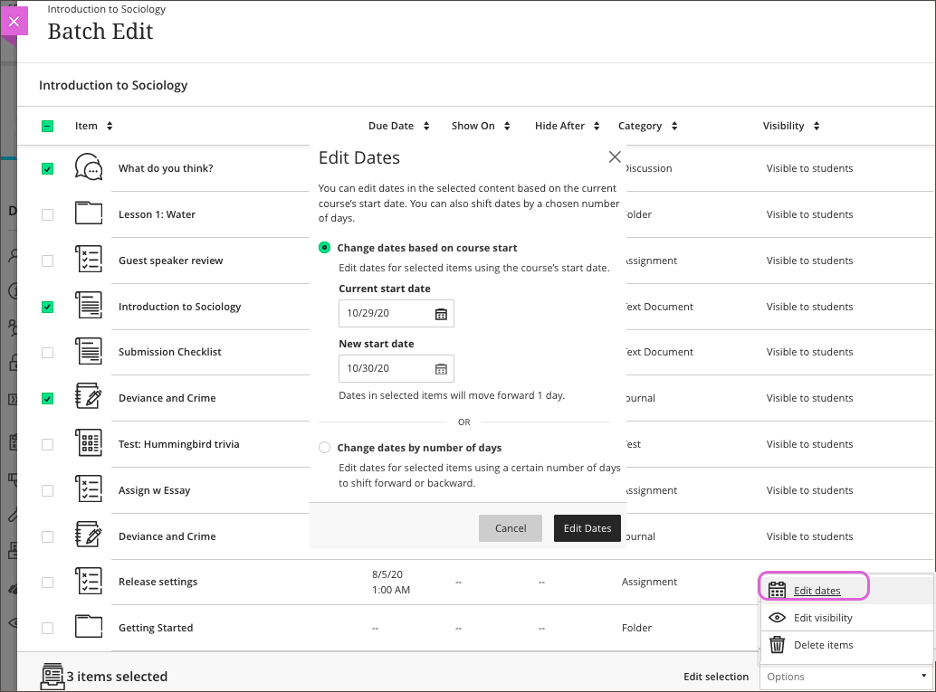
- At the bottom of the window next to Edit selection, choose Edit dates in the Options menu.
- Choose to update due dates based on the course start date or based on a number of days.
- Change dates based on course start: Select a Current start date and a New start date. The tool automatically calculates the number of days between the two dates and adjusts all due dates using that number. After you choose two dates, a message appears to confirm how many days are between them.
Example: My course content was reused from the previous semester, when the course's start date was August 19, 2019. My new course's start date is January 6, 2020. All due dates add 140 days. - Change dates by number of days: Type a number in the Shift dates forward or Shift dates backward field. All due dates for the selected content shift forward or backward based on the field and number you choose.
Example: My course is all set up but a snowstorm at the start of the semester pushes the academic calendar a few days. All due dates add 4 days. - A message appears that your content was updated successfully. Select View Details to confirm which content was updated.
Delete multiple course items
You can use Batch Edit to delete multiple pieces of course content at once.
- On the Batch Edit page, select the check box next to the items you want to update. You can choose individual content items or folders.
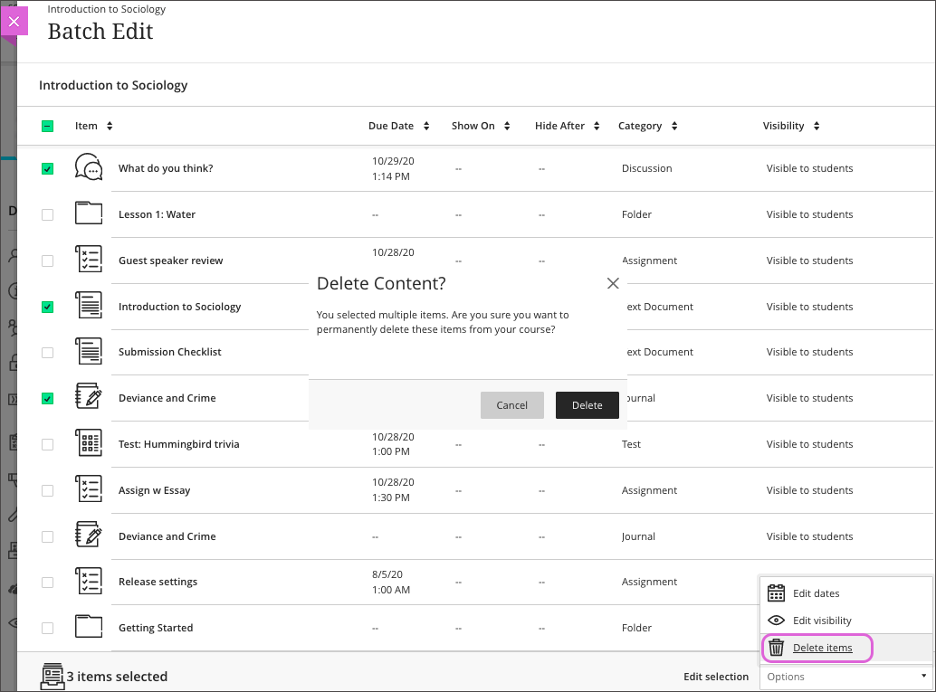
- At the bottom of the window next to Edit selection, choose Delete items in the Options menu.
- If you're sure you want to permanently delete the selected content, select Delete. Or, select Cancel to leave the content intact.
Comments
Please sign in to leave a comment.